
How to Compress Images Without Losing Visible Quality
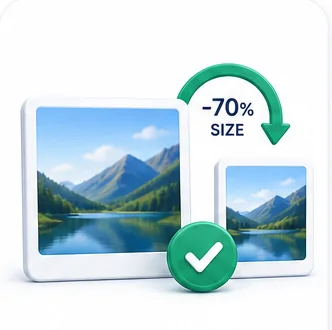
Every photo you take with a modern phone captures far more detail than most uses actually need — a photo destined for a website, an email attachment, or a WhatsApp message doesn't need the full multi-megabyte original your camera produced. Compression exploits that gap, and used correctly, the size reduction is dramatic while the visible quality difference is genuinely close to zero.
Two different kinds of image "shrinking" — and why the distinction matters
People often conflate two genuinely different operations. Resizing reduces the actual pixel dimensions of an image (a 4000×3000 photo becomes 1200×900) — fewer pixels means a smaller file, and if you never needed that many pixels for your use case, there's no real downside. Compression, by contrast, keeps the same pixel dimensions but reduces how much data is used to describe each pixel's color, discarding detail the eye is less likely to notice at typical viewing distances.
The two work well together: resize an image down to the dimensions you'll actually display it at, then compress that resized version — rather than heavily compressing a huge, full-resolution image you're going to display small anyway, which wastes both effort and quality headroom.
Why quality loss is invisible up to a point — and then suddenly isn't
Image compression isn't a straight line where every 10% more compression removes an equal, steadily worsening amount of visible quality. For most photos, there's a wide range where you can compress significantly with zero visible difference, because the discarded detail genuinely falls below what the human eye can distinguish at normal viewing size. Past a certain threshold, quality drops off quickly and visibly — blocky artifacts, color banding, blurred detail. The goal is finding that threshold and staying just above it, not guessing at a single "safe" percentage that works for every image.
What actually determines how much you can compress an image
- Photo content vs. graphic content — real photographs with lots of natural detail and gradients tolerate far more compression invisibly than flat-color graphics, logos, or screenshots (see our JPG vs PNG guide for why).
- Final display size — an image that will only ever be shown as a small thumbnail can be compressed far more aggressively than one that might be viewed full-screen, since fine detail matters less at smaller display sizes.
- How busy or detailed the image is — a photo of a complex, highly-textured scene (leaves, fabric, gravel) hides compression artifacts better than a photo with large smooth areas (sky, a plain wall, skin), where artifacts become visible more easily.
A practical workflow for compressing images well
- Start with resizing if the image is much larger than you'll ever display it at — this alone often accounts for most of the size reduction you actually need.
- Apply a moderate compression setting first rather than jumping straight to maximum compression — check the result before assuming you need to go further.
- View the result at real display size, not zoomed in, before judging whether quality is acceptable.
- For a batch of similar images (a product catalog, an event photo set), test your chosen setting on one representative image first rather than compressing the whole batch blind.
Common Mistakes
Compressing an image while judging quality at 100% zoom on a huge original
Most compressed images will never be viewed at that zoom level. Judge quality at the actual size the image will be displayed — this alone lets most people compress far more than they think they can.
Compressing before resizing, instead of after
Heavily compressing a huge, full-resolution image you're going to display small wastes both quality headroom and processing effort. Resize to your actual display dimensions first, then compress the smaller result.
Using one compression setting for every type of image without checking
A setting that looks great on a busy, detailed photo can look noticeably worse on a smooth, simple image like a portrait or a plain-background product shot. Spot-check different image types rather than assuming one setting fits all.
Compress Your Images Now
Reduce image file size without losing quality — JPG, PNG, WebP, with batch support.
Frequently Asked Questions
Related Articles
Image Guides
JPG vs PNG: Which Should You Actually Use
They look interchangeable but compress completely differently. Here is the real technical difference and a simple rule for picking the right one every time.
PDF Guides
How to Compress a PDF Without Losing Quality
What actually makes a PDF large, why compression looks worse on some files than others, and how to shrink a PDF while keeping text sharp and images usable.
Image Guides
How to Scan a Document With Your Phone Like a Pro
You do not need a scanner. You need good light, a straight angle, and the right cleanup afterward — here is exactly how to get a properly scanned-looking result from just a phone camera.